
No Spinning? No Morphing? Your browser does not support WebGL. Find out more.
Share on Facebook
Follow @vvvv_jsTweet
The result of the previous guides has always been some canvas graphics showing off in the center of the page in a standalone manner, like a Java Applet or a Flash intro back in 1998. But VVVV.js offers a variety of advanced techniques to integrate patches seemlessly into your website. This guide shows how to
with a VVVV.js patch. This will help you to combine the advantages of both, UI elements/layout with HTML/CSS, and swift graphics development with VVVV.js.
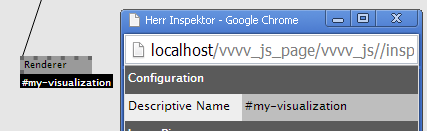
The basic idea about how VVVV.js communicates with the surrounding DOM is to bind certain nodes to DOM elements using selectors. You
do so by setting the Descriptive Name pin of a node to a DOM selector. Descriptive Name is a hidden pin, and can only be set via
the Inspektor: select the node and hit CTRL+I. This DOM selector string
goes straight into jQuery, so you can use anything jQuery understands here. Read more about it in the jQuery documentation.
CTRL+I to open the Inspektor window.
Some basic examples:
| Selector | Description | Example |
|---|---|---|
| h1 | matches all `<H1>` elements | <h1>The first heading</h1>, <h1>Another heading</h1> |
| .menu-item | matches all elements which have the class menu-item |
<a class="menu-item">Home</a>, <a class="menu-item active">Docs</a> |
| #total-amount | matches the one element with ID total-amount. IDs have to be unique within a DOM, so this can only match one element |
<div id="total-amount">300.00</div> |
In most practical cases you want to place VVVV.js generated graphics output at a certain location on your site: a data visualisation next to a table, a morphing ribbon of polygons as a header animation, etc.
When you create a Renderer node, a <CANVAS> element is appended to the end of the page as default. You have to tell the renderer where to put
that <CANVAS> element instead, by providing a DOM selector matching the target element to the Renderer's Descriptive Name pin.
The following shows the most common example, where the HTML document contains a <DIV> element which serves as placeholder for
the VVVV.js output:
To place VVVV.js' graphical output into that placeholder, we have to associate the Renderer node with the element with ID test_result_viz,
by setting its Descriptive Name pin to #test_result_viz:
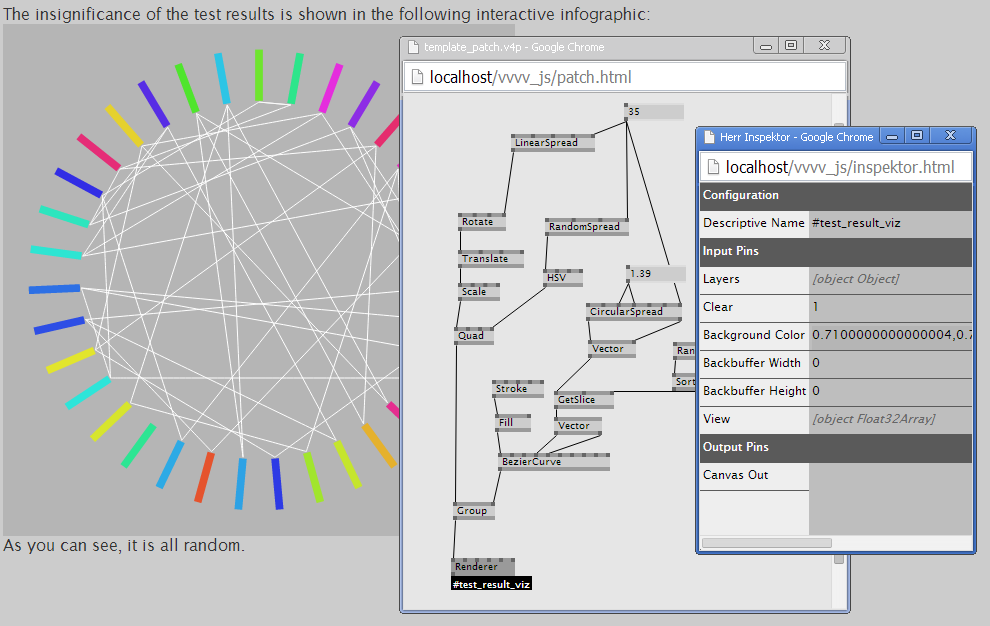
<DIV id="test_result_viz"> element.
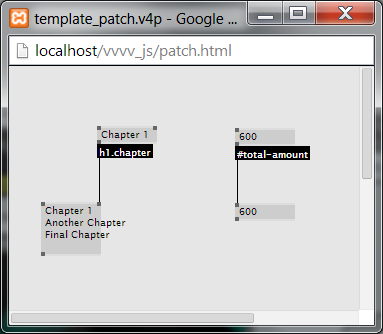
You can use IOBoxes to read text, attributes, events and style information from the surrounding DOM tree. This is a handy method to e.g. transform textual data provided in a table into a chart. Also, it's a good practise to get all kinds of data from your backend into the VVVV.js patch.
Again, we are using the Descriptive Name pin to reference a DOM element. The IOBox is automatically populated with the matching values from the DOM. If there are multiple elements matching, the IOBox will contain as much slices as there are matching values.
To retreive text nodes (that's the content between the tags), just provide a suitable DOM selector to the IOBox's Descriptive Name
|
<body>
...
<h1 class="chapter">Chapter 1</h1>
<div id="total-amount">600.00</div>
<h1 class="chapter">Another Chapter</h1>
Lorem ipsum
<h1 class="chapter">Final Chapter</h1>
Some foxes over fences.
...
</body>
|
|
To read attributes, use a suitable selector followed by /attribute/[attribute name]:
|
<body>
...
<select id="country">
<option value="AT">Austria</option>
<option value="CH">Switzerland</option>
<option value="DE">Germany</option>
</select>
...
</body>
|

|
select#country option refers to all <OPTION> elements within the <SELECT> element. The string attribute/value appended
to it retreives the "value" attribute rather than the enclosed text.
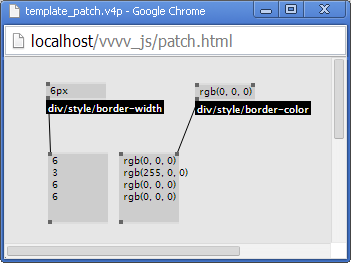
By appending /style/[css property] to a selector, you can access an element's CSS information.
|
<head>
<style type="text/css">
.thick-borders{border-width:6px; border-color:black; border-style:solid}
.thin-borders{border-width:1px; border-color:red; border-style:solid}
</style>
</head>
<body>
...
<div class="thick-black-borders">Div 1</div>
<div class="thin-red-borders">Div 2</div>
<div class="thick-black-borders">Div 3</div>
<div class="thick-black-borders">Div 4</div>
...
</body>
|
|
/style/[property name] we can get CSS properties of elements.
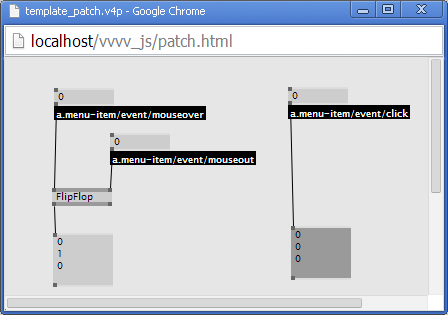
Adding event/[event name] to a selector allows you to capture events like mouse clicks, key presses, etc. fired in the surrounding page. The IOBox bound to an event will output
the value 1 for exactly one frame, when the event is fired.
|
<body>
...
<a class="menu-item" href="...">Home</a>
<a class="menu-item" href="...">About</a>
<a class="menu-item" href="...">Contact</a>
...
</body>
|
|
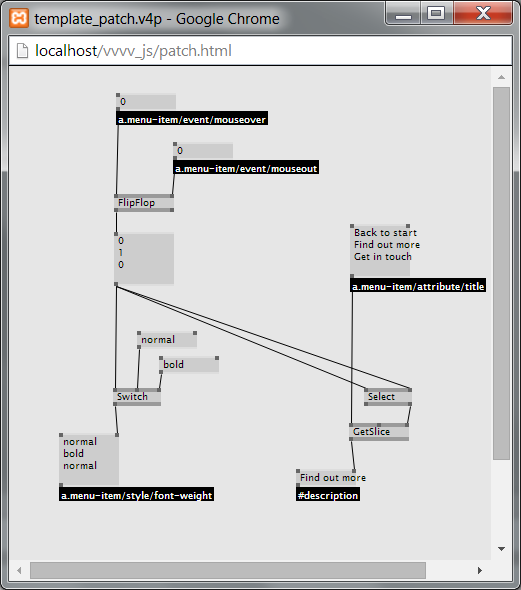
You can also use DOM-referencing IOBoxes like this to write text nodes, attributes and style properties. Just use the same selectors as described above, but apply them to "sink" IOBoxes (IOBoxes at the end of a node network).
By combining reading and writing IOBoxes, you can set up your patch to continuously process the DOM and manipulate it based on the DOM data like this:
|
<body>
...
<a class="menu-item" title="Back to start" href="...">Home</a>
<a class="menu-item" title="Find out more" href="...">About</a>
<a class="menu-item" title="Get in touch" href="...">Contact</a>
<div id="description"></div>
...
</body>
|
|
<DIV id="description"> element
with the description taken from the title attribute.
