
No Spinning? No Morphing? Your browser does not support WebGL. Find out more.
Share on Facebook
Follow @vvvv_jsTweet
A big part of VVVV.js version 1.1 was narrowing the gap between visual and textual programming. And while our previous post covered textual programming in the visual programming environment, this time it's kind of the other way around: achieving classic webdev programming tasks with pure VVVV.js.
Until now, you were able to use VVVV.js to embed realtime graphics into a website. You were also able to interface with surrounding elements, but you had to create and style these elements first – usually by coding HTML, CSS and JavaScript. The new HTML nodes hope to help here, so you can develop functionality happening outside the renderer windows, without leaving the patch.
 The Demo shows most of the concepts in action. Make sure to open the patch, to see how it works.
Using the Element node, you can create every kind of HTML element. Choose the tag name and the node content. Use the inspector to define attribute pins. Besides manually filling the Element node, there are various "shortcut" nodes, like Image or Link which come with preconfigured attribute pins.
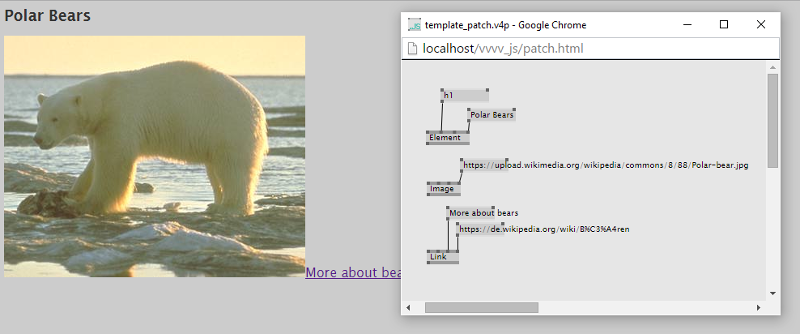 Creating HTML elements on the page using either the generic "Element" node, or one of the predefined helpers, like "Image" or "Link".
The element nodes described above all have a Style In input pin, which can be connected to the respective nodes. There is again a generic node simply called Style which lets you set all kinds of CSS attributes. And again, there are some convenience nodes, which might help you if you don't know all CSS attributes by heart, and also make the patch more readable.
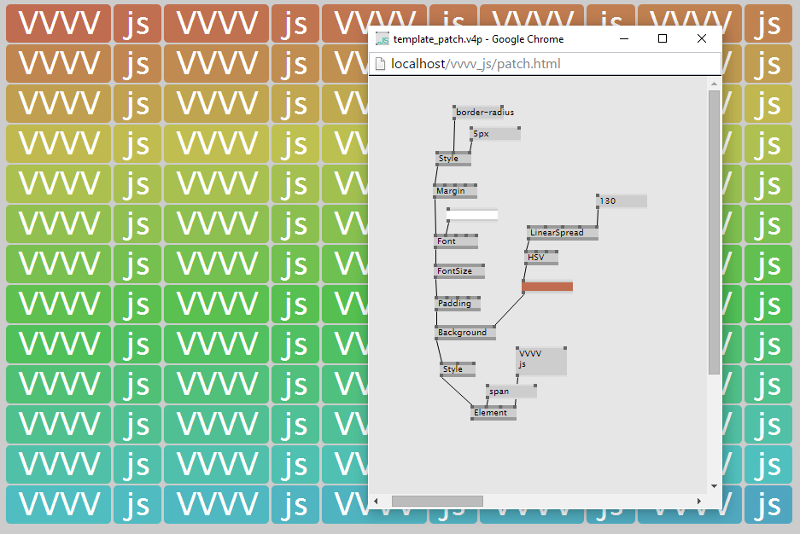 The <span> element created in the patch is styled by various Style nodes, like "Background", "Padding", "FontSize", etc. Because the background color is spreaded across 130 slices, 130 HTML elements are created.
You can chain up the Style nodes similar to chaining up Render State nodes. It is like defining a render state, and assigning it to elements by connecting. Also note, that it works pretty well with spreads.
Each Element node has a Parent input pin, which can be connected to another Element node. You can use the Group node to preserve the order of the nested elements. Note, that this whole grouping thing does not work like we are used to from VVVV, but it's flipped right upside down. This is to avoid elements being nested into multiple other elements, which would be confusing. In general, this direction matches much more the tree-structure of an HTML DOM. When reading from upside down, instead of thinking "this element goes into that element", think "this element contains that element".
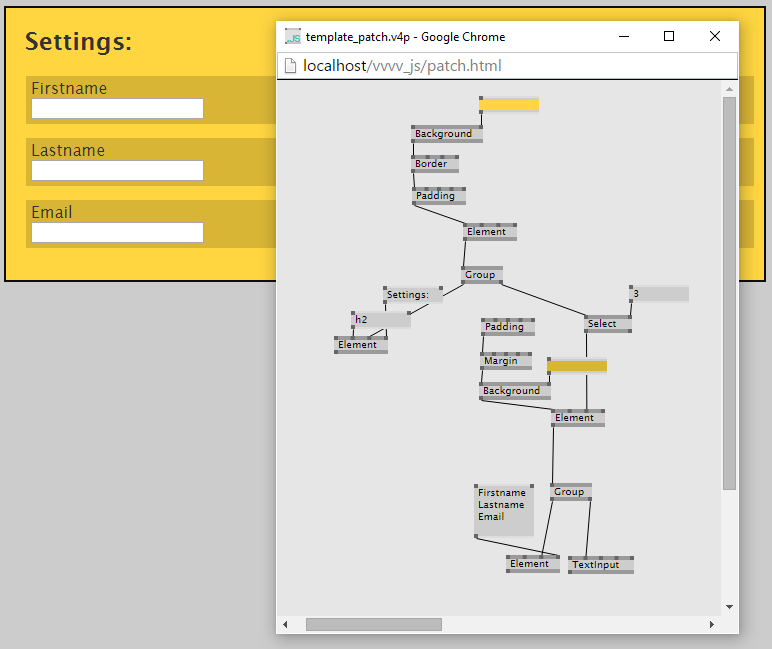 Nesting elements using the "Parent" pins. Here, the yellow box is parent of the "Settings" headline, and three darker boxes. The three darker boxes again each are parent of a label and a text input box.
You can use the event nodes to catch user interaction events like mouse clicks, key presses, etc. from DOM elements. It's the same story here: a generic OnEvent node, and some predefined nodes like OnClick, OnMouseOver, etc. to make your life easier. All these nodes get an element as input, and as in classic VVVV manner, bang a 1 when the event occures.
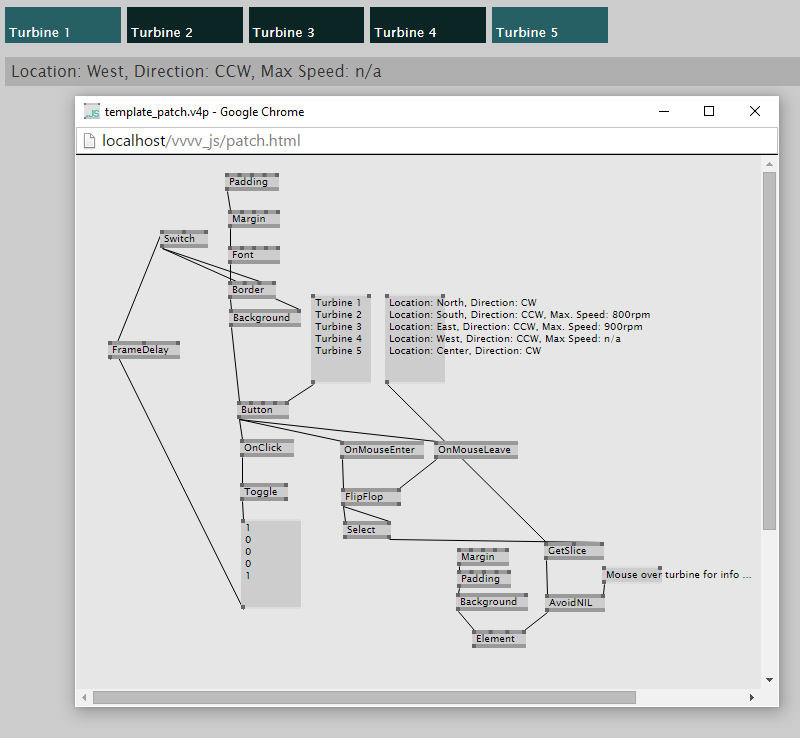 Five buttons are created using a spreaded input on the "Button" node. The "OnClick" node outputs a spread of 5 slices, where each slice is set to 1 if the respective button has been clicked. Note, how the result of "OnClick" is influencing the buttons' styling via the "FrameDelay" node. By using "OnMouseOver" and "OnMouseOut" we detect which button is being hovered over, and display the respective info text in another element.
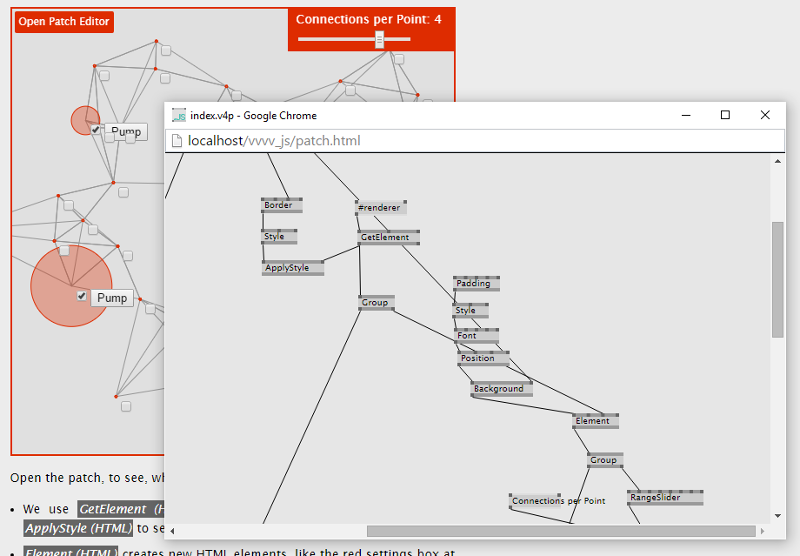
In order to get hands on elements which are not created in VVVV, you can use the GetElement (HTML) node. It takes a DOM selector as input, and delivers the matching elements as output. You can use these elements just as you can use the ones created in VVVV.js: style them using ApplyStyle (HTML), nest other element into them, or catch events for these elements.
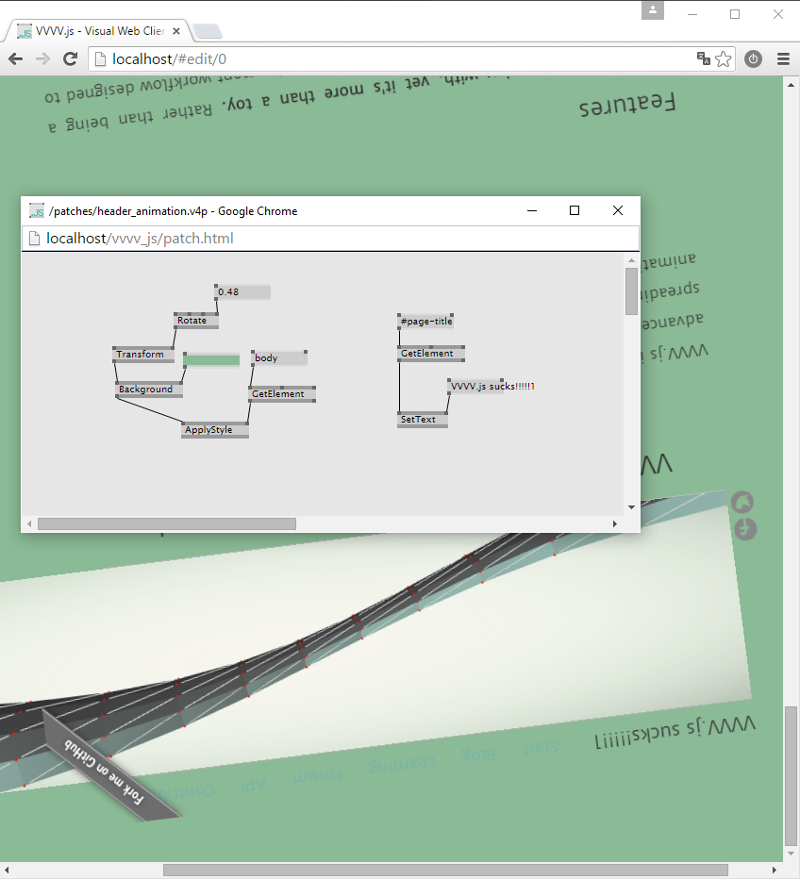 Using "GetElement (HTML)" to select the VVVV.js website's <body> element to change its background and flip it upside down. The "SetText" node with the selected "#page-title" element changes the websites title.
Of course this all won't ever be a complete replacement for classic web design craftmanship, and you are not supposed to build entire websites this way (although you can – hello 000.grapics!). But it allows you to tighter connect your canvas/webgl content with the HTML surrounding it, and helps you to make use of all browser capapilities (like typography, element flow, UI elements, etc.) in a patching-manner.
